
With Shutterstock’s Editor tool, bloggers and social media managers alike can resize their photos, seamlessly shifting from the correct image dimensions for a Twitter Post to an Instagram Story to a Facebook Link. It is just as simple to alter an image’s hue or temperature, brightness or exposure, all with a simple click.
Vendor
Shutterstock
Company Website


Online image content is updated at a staggering pace. With nearly 1000 photos uploaded to Instagram every second, 14.5 million photos to Facebook every hour, and 500 million tweets to Twitter every day, brands that intend to keep up with that rapid flow need a fast, easy way to customize their images. Whether you’re a blogger focused on your writing or a social media manager juggling multiple platforms, a quick-to-use image editing tool is key to staying relevant and catching the eye of your audience. With Shutterstock’s Editor tool, bloggers and social media managers alike can resize their photos, seamlessly shifting from the correct image dimensions for a Twitter Post to an Instagram Story to a Facebook Link. It is just as simple to alter an image’s hue or temperature, brightness or exposure, all with a simple click.
What is image editing?
Image editing refers to the process of modifying digital or traditional photographs or illustrations using the different tools and techniques of a specific software. It is done to improve the overall quality of an image. Unwanted elements or background noise can be reduced with the help of cropping or blur and vignette effects. Messages can be added with text features and set inside shapes such as speech bubbles. One can alter an image’s color via filters that brighten or darken, as well as effects that change saturation, contrast, and exposure.
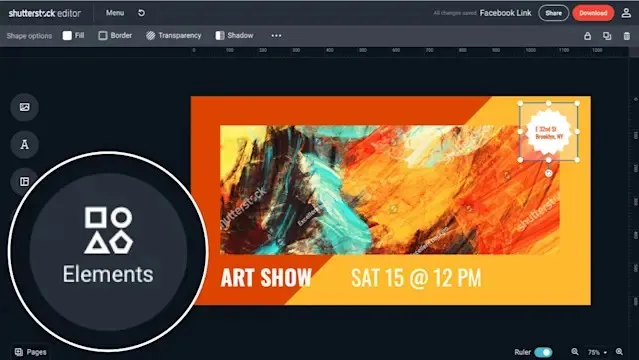
How to edit images and photos with Shutterstock Editor
Shutterstock Editor is a straightforward design tool that assists beginners and professionals in the creation of customized images. With a wide range of creative filters at your fingertips, Shutterstock Editor makes it easy to edit both stock images and your own uploaded shots. Experiment with traditional filters, modern elements, predesigned templates and more. Step 1: Search for an image or upload your own Start by browsing the available images in Shutterstock Editor by selecting the “Images” icon in the toolbar on the left side of the page. Enter a keyword to search for your desired image. Then click the slider icon on the right side of the search bar to adjust image search filters. Finally, you can search through All Images or select only Photos, Illustrations, or Vectors. You can also upload your own image. Go to the toolbar on the left side of the page and select the “My Files” icon at the bottom. Click “Uploads” and then select the red Upload icon. Select your personal JPG or PNG from your computer. Once uploaded, click your image. It will appear in the edit area. Step 2: Use ready-made templates Ready-made photo templates make it that much easier for you to customize an image with a few simple clicks. Here is what you can do. Go to the toolbar on the left side of the page and select the “Templates” icon. Scroll through the predesigned images. Pick the one that suits your needs. Adjust the template as desired. Step 3: Use creative elements Need to get a point across to viewers? Elements such as emojis can be added to an image to convey a playful tone or specific emotional response, while the Text feature allows you to type out a clear message. Once you have your image selected and set in the editing area, go to the toolbar on the left side of the page and select either the “Text” or “Elements” icon. Further personalize your Text and Elements by adjusting the fonts, filters, and size. License the final image by clicking on “Download” in the upper-right corner of the page.